
Learn how to make a perfectly roasted Cornish hen with vegetables. This easy recipe delivers restaurant-quality results at home.
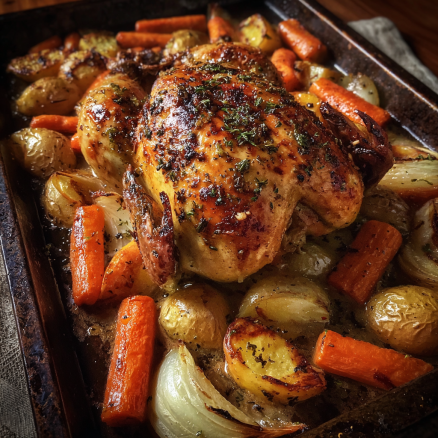
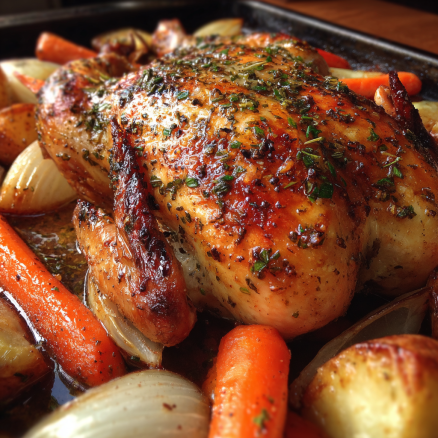
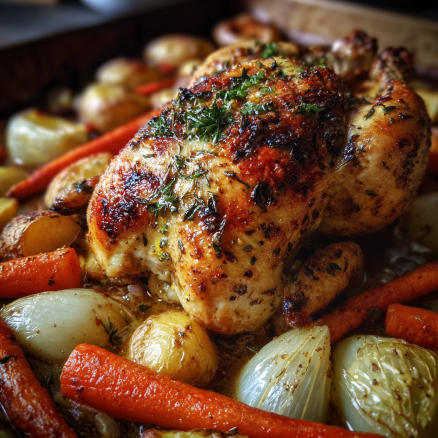
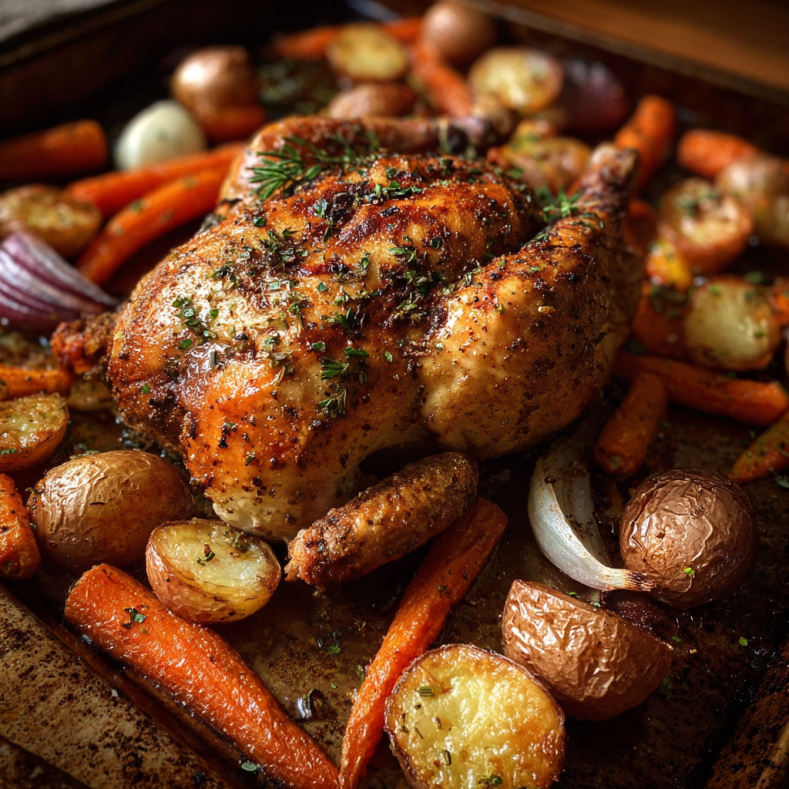
Picture this: golden-brown roasted Cornish hen resting on a bed of caramelized vegetables. The skin is crispy. The meat is juicy. Your kitchen smells amazing.
Here’s the best part. This dish looks and tastes gourmet, but it’s surprisingly simple to make. You don’t need fancy skills or hard-to-find ingredients. Just a hot oven, good seasoning, and about an hour.
Cornish hen with vegetables transforms any meal into something special. Planning a romantic date night? This is your dish. Hosting Sunday dinner? Your guests will be impressed. Want to treat yourself on a weeknight? Why not?
Let’s explore why this easy roasted Cornish hen recipe deserves a place in your cooking rotation. We’ll cover everything from selecting the perfect bird to achieving that irresistible crispy skin.
Why Choose Roasted Cornish Hens
The Perfect Single-Serving Bird
Cornish hens offer something chicken can’t match: individual presentation. Each person gets their own whole bird. This feels special and luxurious.
The size is ideal too. One hen serves one to two people comfortably. No carving at the table. No fighting over the best pieces. Everyone gets the same elegant experience.
Plus, smaller birds cook faster than whole chickens. Your oven-roasted Cornish game hen will be table-ready in about 60 minutes. That’s weeknight-friendly timing with weekend-worthy results.
Superior Flavor and Texture
Cornish hens taste incredibly tender. The meat stays moist and flavorful throughout cooking. The smaller size means more even heat distribution.
The skin-to-meat ratio works in your favor too. More surface area means more crispy, golden skin. And who doesn’t love crispy poultry skin?
These birds also absorb seasonings beautifully. Their mild, slightly sweet flavor pairs well with almost any herb or spice blend. This versatility makes them perfect for experimenting with different flavor profiles.
Restaurant-Quality Presentation at Home
Let’s be honest. Presentation matters. A whole roasted Cornish hen on a plate looks impressive. It says “special occasion” without screaming “I stressed over this for hours.”
Restaurants charge premium prices for dishes like this. But you can create the same experience at home for a fraction of the cost. Your dinner guests will think you’ve been to culinary school.
Essential Ingredients for Perfect Roasted Cornish Hen
The Star: Your Cornish Hens
You’ll need 2 Cornish game hens (about 1.5 to 2 pounds each). Look for fresh birds when possible. However, frozen works perfectly fine if thawed properly.
Make sure they’re fully defrosted before cooking. This usually takes 24 hours in the refrigerator. Never rush this step with warm water. Patience ensures even cooking.
Building Your Seasoning Blend
Great seasoning makes good poultry exceptional. Here’s what you need:
For the Hens:
- 4 tablespoons butter (softened for easy spreading)
- 2 tablespoons olive oil (adds richness and helps browning)
- 4 cloves garlic (minced fresh for best flavor)
- 2 teaspoons fresh thyme (or 1 teaspoon dried)
- 2 teaspoons fresh rosemary (or 1 teaspoon dried)
- 1 teaspoon paprika (adds color and mild sweetness)
- 1 teaspoon salt (kosher or sea salt works best)
- ½ teaspoon black pepper (freshly ground tastes better)
- 1 lemon (cut into quarters for cavity stuffing)
For the Vegetables:
- 4 medium carrots (cut into chunks)
- 3 medium potatoes (quartered)
- 1 large red onion (cut into wedges)
- 2 cups Brussels sprouts (halved)
- 3 tablespoons olive oil
- Salt and pepper to taste
- Fresh herbs for garnish
These ingredients create layers of flavor. The butter helps the skin crisp up. The herbs add aromatic depth. The vegetables roast alongside the hens, soaking up all those delicious drippings.
Step-by-Step Roasting Instructions
Preparing Your Cornish Hens
Start by preheating your oven to 425°F. This high temperature is key to crispy skin.
Remove the hens from packaging. Pat them completely dry with paper towels. Moisture is the enemy of crispy skin. Take your time with this step.
Season the cavity of each hen with salt and pepper. Stuff each with lemon quarters and a sprig of fresh herbs. This adds flavor from the inside out.
Creating the Perfect Herb Butter
Mix softened butter with olive oil, minced garlic, and chopped herbs. This mixture becomes your flavor paste.
Gently separate the skin from the breast meat. Use your fingers to create a pocket. Be careful not to tear the skin.
Spread half the herb butter under the skin directly on the meat. This keeps the breast meat incredibly moist. Rub the remaining mixture all over the outside of both hens.
Season the outside generously with salt, pepper, and paprika. Don’t be shy here. Good seasoning makes all the difference.
Preparing Your Vegetables
Toss your vegetables with olive oil, salt, and pepper. Spread them in a large roasting pan or sheet pan. They should have some space between them for proper caramelization.
Place the seasoned hens directly on top of the vegetables. The vegetables act as a roasting rack. Plus, they’ll catch and absorb the flavorful drippings.
Roasting to Golden Perfection
Place the pan in your preheated oven. Roast for 50 to 60 minutes. The exact time depends on the size of your hens.
You’ll know they’re done when:
- The skin turns deep golden brown
- The internal temperature reaches 165°F in the thickest part of the thigh
- The juices run clear when pierced
- The legs move easily in their sockets
Baste the hens with pan drippings halfway through cooking. This adds extra flavor and promotes even browning.
The Crucial Resting Period
Remove the pan from the oven. Let the hens rest for 10 minutes before serving. This step is essential.
Resting allows the juices to redistribute throughout the meat. Cut too soon and those juices end up on the cutting board instead of in your mouth.
Cover loosely with foil during resting. The carryover heat will finish the cooking perfectly.
Vegetable Pairing Ideas
Classic Root Vegetables
Root vegetables are traditional for good reason. Carrots, potatoes, and parsnips roast beautifully alongside Cornish hens. They become sweet and caramelized.
Cut everything into similar-sized pieces. This ensures even cooking. Toss with olive oil, salt, pepper, and fresh thyme.
Mediterranean-Style Vegetables
Try bell peppers, zucchini, cherry tomatoes, and red onion for a lighter option. Add garlic cloves and fresh oregano for authentic Mediterranean flavor.
These vegetables cook slightly faster than root vegetables. Add them to the pan 20 minutes into the roasting time.
Winter Squash and Brussels Sprouts
Butternut squash cubes and halved Brussels sprouts create a hearty, seasonal pairing. The squash becomes tender and sweet. The Brussels sprouts get crispy edges.
This combination works especially well for holiday meals. The colors look festive and inviting.
Green Beans and Mushrooms
For something different, try green beans and whole mushrooms. They add earthiness and a nice color contrast.
Add these during the last 25 minutes of cooking. They need less time than denser vegetables.
Serving Suggestions for Every Occasion
Romantic Date Night at Home
Dim the lights. Light some candles. Serve one hen per person with roasted vegetables arranged artfully on the plate.
Add a simple side salad and a glass of wine. This meal rivals any restaurant experience. Your date will be thoroughly impressed.
Holiday Dinner Alternative
Tired of cooking massive turkeys? Roasted Cornish hen makes an elegant holiday alternative. Each guest gets their own perfectly cooked bird.
This works especially well for smaller gatherings. No complicated carving required. Everyone starts eating at the same time.
Serve with cranberry sauce, dinner rolls, and your favorite holiday sides. The individual presentation adds a special touch to the celebration.
Sunday Family Dinner
Make Sunday special again with this comforting yet elegant meal. The whole house fills with amazing aromas while the hens roast.
Let younger family members help with vegetable prep. It’s a great way to teach cooking skills. Plus, everyone appreciates meals more when they help create them.
Serve family-style on a large platter. The presentation is stunning and encourages conversation around the table.
Storage and Reheating Tips
Proper Storage Methods
Allow leftover hen and vegetables to cool completely. Store in airtight containers in the refrigerator. They’ll stay fresh for up to 3 days.
Keep the meat and vegetables in separate containers if possible. This makes reheating easier and more controlled.
Label containers with the date. This helps you track freshness and avoid food waste.
Reheating for Best Results
The oven gives the best reheating results. Preheat to 350°F. Place hen pieces in a baking dish with a splash of chicken broth. Cover with foil.
Heat for 15 to 20 minutes until warmed through. Remove the foil for the last 5 minutes to re-crisp the skin.
For vegetables, spread them on a baking sheet. Drizzle with a little olive oil. Roast uncovered at 400°F for 10 minutes.
Avoid the microwave if possible. It makes the skin soggy and the meat rubbery.
Freezing Considerations
Cooked Cornish hen can be frozen for up to 2 months. Wrap tightly in plastic wrap, then aluminum foil. This prevents freezer burn.
Thaw overnight in the refrigerator before reheating. Never thaw at room temperature. Food safety matters.
The texture changes slightly after freezing. Fresh is always better. But frozen leftovers still taste good in a pinch.
Pro Tips for Crispy Skin
Want that restaurant-quality crispy skin? Follow these expert tricks:
Dry thoroughly. Pat the hens completely dry before seasoning. Moisture prevents browning.
Use high heat. Start at 425°F for the first 20 minutes. This jump-starts the crisping process.
Don’t crowd the pan. Air circulation is crucial. Give each hen plenty of space.
Baste strategically. Baste once or twice during cooking. Too much makes the skin soggy.
Rest before cutting. This keeps the skin crispy and the meat juicy.
Conclusion: Simple Elegance on Your Plate
Roasted Cornish hen with vegetables proves that elegant dining doesn’t require complicated techniques. This dish delivers impressive results with straightforward methods.
The individual presentation feels luxurious. The flavor is rich and satisfying. The preparation is manageable even on busy weeknights.
Whether you’re cooking for a special occasion or treating yourself to something nice, this easy roasted Cornish hen recipe fits the bill perfectly. It’s versatile enough for any season and pairs beautifully with countless vegetable combinations.
So grab some Cornish hens on your next grocery run. Preheat that oven. In about an hour, you’ll be enjoying a meal that looks like it came from a high-end restaurant.
Your kitchen. Your rules. Your gourmet experience.
Frequently Asked Questions
What’s the difference between Cornish hens and chicken?
Cornish hens are actually young chickens, usually harvested at 5 to 6 weeks old. They weigh 1 to 2 pounds. Regular chickens are older and larger, typically 3 to 4 pounds or more.
The main differences are size and tenderness. Cornish hens have more delicate, tender meat. They also have a slightly sweeter flavor.
The cooking time is shorter for hens because of their smaller size. They’re perfect when you want the experience of a whole roasted bird without the time commitment.
Can I roast Cornish hens with other vegetables?
Absolutely! This recipe is very flexible. Almost any vegetable that roasts well will work beautifully.
Try sweet potatoes, bell peppers, asparagus, or fennel. Harder vegetables like carrots need the full cooking time. Softer vegetables like zucchini should be added later.
Just remember to cut everything into similar sizes. This ensures even cooking. Season all vegetables generously with salt, pepper, and herbs.
The hens’ drippings flavor whatever vegetables you choose. That’s part of what makes this one-pan meal so delicious.
How long does it take to roast Cornish hens?
A typical 1.5 to 2-pound Cornish hen takes 50 to 60 minutes at 425°F. Smaller hens cook faster. Larger ones need more time.
The best way to check doneness is with a meat thermometer. Insert it into the thickest part of the thigh without touching bone. You want 165°F.
Visual cues help too. The skin should be deep golden brown. The juices should run clear when pierced. The legs should wiggle easily.
Always let the hens rest for 10 minutes after roasting. This isn’t included in the cooking time but is essential for juicy meat.
How do I get crispy skin on Cornish hens?
Crispy skin requires three things: dry surface, high heat, and proper fat.
First, pat the hens completely dry before seasoning. Even a little moisture prevents crisping. Use paper towels and be thorough.
Second, start with a hot oven (425°F). This high temperature renders the fat quickly and crisps the skin.
Third, use butter or oil on the outside of the bird. The fat helps conduct heat and promotes browning.
Don’t cover the hens while roasting. Steam makes skin soggy. Roast uncovered for the crispiest results.
Can I make this recipe ahead of time?
You can do some prep work ahead, but the actual roasting is best done just before serving.
Season the hens up to 24 hours in advance. Store them covered in the refrigerator. This actually improves flavor as the seasonings penetrate the meat.
Prep and season your vegetables a few hours ahead. Store them separately until ready to roast.
However, roast everything fresh when you’re ready to eat. Roasted Cornish hen tastes best straight from the oven. The skin stays crispiest and the meat is at peak juiciness.
If you must make it ahead completely, follow the reheating instructions carefully to restore as much of that fresh-roasted quality as possible.