
Bake these incredible caramel apple cheesecake bars! Buttery crust, creamy filling, spiced apples, and caramel. Perfect fall dessert!
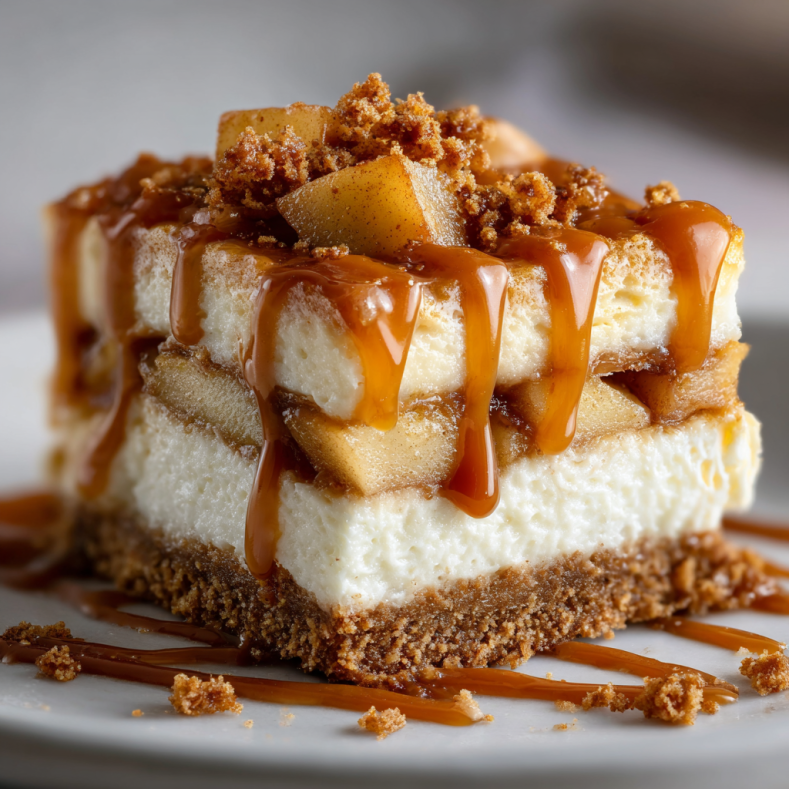
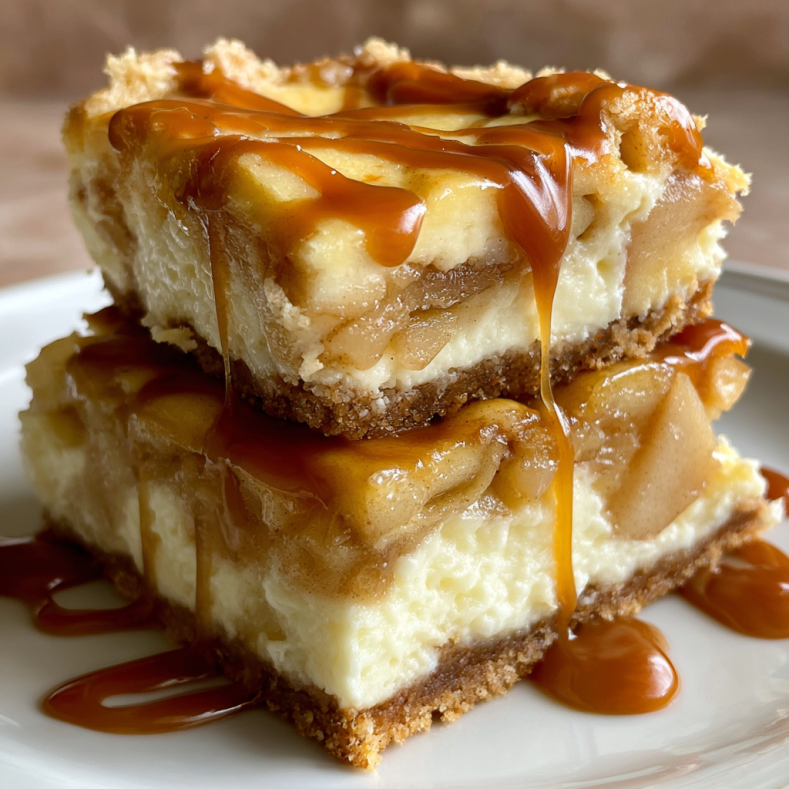
When autumn arrives, you need a dessert that captures the season in every bite. Caramel apple cheesecake bars do exactly that. Imagine a buttery graham cracker crust topped with silky cheesecake, cinnamon-spiced apples, and a generous drizzle of golden caramel. Every layer delivers pure fall bliss.
This isn’t just another dessert. It’s the recipe that makes your kitchen smell like a bakery. It’s the bars everyone fights over at potlucks. It’s the treat that disappears before the main course even arrives.
The beauty of this fall dessert recipe is how it combines three beloved flavors: rich cheesecake, tender apples, and buttery caramel. Each component is delicious alone. Together, they create something extraordinary that tastes like autumn comfort in dessert form.
Whether you’re planning Thanksgiving dessert, hosting a fall gathering, or just craving something special, these apple cheesecake bars deliver. They look impressive but come together more easily than you’d expect. They’re make-ahead friendly and feed a crowd from one pan.
Ready to bake the dessert everyone will be talking about? Let’s get started.
Why This Dessert Is Fall in Every Bite
The Perfect Seasonal Flavor Combination
Caramel and apples are autumn’s power couple. The sweet, buttery caramel complements tart apples perfectly. Add creamy cheesecake to the mix and you’ve created dessert magic.
The warm spices—cinnamon, nutmeg, and a hint of vanilla—enhance everything. They make your house smell incredible while baking. That aroma alone creates anticipation and excitement.
This dessert captures everything we love about fall baking. The cozy spices. The seasonal fruit. The indulgent caramel. All wrapped up in convenient, portable bars that slice beautifully.
Crowd-Pleasing Portability
Unlike traditional cheesecake that requires careful slicing, these bars cut into neat squares. They’re perfect for potlucks, bake sales, or any gathering where serving needs to be easy.
The bars are sturdy enough to pick up with your hands. They’re also elegant enough to plate with a fork. This versatility makes them suitable for casual and formal occasions alike.
One pan makes 12 to 16 bars depending on how you cut them. That’s enough to feed a crowd or provide leftovers for days. Either scenario is a win.
Easier Than Traditional Cheesecake
Traditional cheesecake intimidates many bakers. Water baths. Precise temperatures. Cracking risks. These easy cheesecake bars eliminate those concerns. No water bath required. No springform pan needed. Just mix, layer, and bake.
The bars are more forgiving than full cheesecakes. Small cracks don’t matter because you’ll cover them with apples and caramel. The pressure is off, allowing you to enjoy the baking process.
Even beginner bakers succeed with this recipe. The steps are straightforward. The ingredient list is manageable. Success is almost guaranteed.
Make-Ahead Magic
These bars actually improve when made ahead. The flavors meld overnight. The cheesecake sets perfectly. The apples infuse their flavor throughout.
Make them a day or two before your event. Keep them chilled until serving time. You’ll have one less thing to worry about on the big day. That peace of mind is priceless during busy seasons.
They also freeze beautifully for even further advance preparation. Bake during a free weekend. Freeze and save for Thanksgiving. Your future self will thank you.
Essential Ingredients for Perfect Caramel Apple Cheesecake Bars

The Graham Cracker Crust
For the Base:
- 2 cups graham cracker crumbs (about 16 crackers)
- 1/4 cup granulated sugar
- 1/2 cup melted butter
- 1/4 teaspoon cinnamon (optional, adds warmth)
Graham crackers create that classic cheesecake crust flavor. Crushing them yourself produces the best texture. Use a food processor or put them in a bag and crush with a rolling pin.
The butter binds everything together while adding richness. Melted butter distributes more evenly than softened butter. Make sure it’s fully melted for best results.
The Creamy Cheesecake Layer
For Silky Perfection:
- 16 ounces cream cheese, softened (two 8-oz packages)
- 1/2 cup granulated sugar
- 2 large eggs, room temperature
- 1/4 cup sour cream
- 1 teaspoon vanilla extract
- 1/4 teaspoon salt
Cream cheese must be softened to room temperature. Cold cream cheese creates lumps that won’t blend out. Leave it on the counter for an hour before starting.
Room temperature eggs incorporate more easily. They create a smoother batter. Pull them out when you take out the cream cheese.
Sour cream adds tanginess and keeps the cheesecake extra creamy. It also prevents that dry, crumbly texture that happens with some cheesecakes.
The Spiced Apple Topping
For Autumn Flavor:
- 3 medium apples, peeled and diced small (Granny Smith or Honeycrisp)
- 2 tablespoons butter
- 1/4 cup brown sugar, packed
- 1 teaspoon cinnamon
- 1/4 teaspoon nutmeg
- 1 tablespoon cornstarch
- 1 tablespoon lemon juice
Choose firm apples that hold their shape when cooked. Granny Smith provides tartness. Honeycrisp offers sweetness. A combination works beautifully.
The cornstarch thickens the apple mixture, preventing it from being too wet. This keeps the cheesecake layer from getting soggy.
The Caramel Drizzle
For Sweet Finishing:
- 1/2 cup caramel sauce (store-bought or homemade)
- Optional: flaky sea salt for salted caramel effect
- Optional: 1/2 cup chopped pecans or walnuts
Store-bought caramel works perfectly and saves time. Look for quality brands with good flavor. Thick caramel drizzles better than thin.
Homemade caramel tastes amazing but requires extra steps. Start with store-bought your first time. Graduate to homemade once you’ve mastered the bars.
Step-by-Step Baking Instructions
Preparing the Crust
Preheat your oven to 325°F. Line a 9×13-inch baking pan with parchment paper, leaving overhang on two sides. This makes removing the bars easy later.
In a medium bowl, combine graham cracker crumbs, sugar, and cinnamon if using. Pour in melted butter. Stir until mixture resembles wet sand. It should clump when squeezed.
Press mixture firmly into the bottom of your prepared pan. Use the bottom of a measuring cup to compact it evenly. A firm, even crust prevents crumbling later.
Bake the crust for 10 minutes. This sets it slightly and prevents it from becoming soggy under the cheesecake. Let it cool while you make the filling.
Making the Cheesecake Layer
In a large bowl, beat softened cream cheese with an electric mixer until smooth and fluffy, about 2 minutes. Scrape down the sides of the bowl frequently.
Add sugar and beat until combined. Add eggs one at a time, beating just until incorporated after each. Don’t overmix once eggs are added. This creates too much air and can cause cracking.
Mix in sour cream, vanilla, and salt. Beat on low just until smooth. The batter should be creamy and lump-free. Pour over the pre-baked crust and spread evenly.
Tap the pan gently on the counter a few times. This releases air bubbles that can create holes in your cheesecake layer.
Preparing the Apple Topping
While the cheesecake bakes, prepare your apples. Peel and dice them into small, uniform pieces. Small pieces cook faster and distribute better over the cheesecake.
Melt butter in a large skillet over medium heat. Add diced apples. Cook for 3 to 4 minutes, stirring occasionally. The apples should soften slightly but still hold their shape.
Add brown sugar, cinnamon, and nutmeg. Stir to coat the apples. Cook for another 2 minutes. The sugar will melt and create a syrup.
Sprinkle cornstarch over the apples and stir quickly to combine. Add lemon juice. The mixture will thicken almost immediately. Remove from heat and let cool slightly.
Assembly and Final Baking
Bake the cheesecake layer for 25 to 30 minutes. The center should be mostly set but still slightly jiggly. The edges will look set and slightly puffed.
Remove from oven. Spoon the cooked apple mixture evenly over the top. Spread gently to cover the entire surface. The residual heat will continue cooking the cheesecake slightly.
Return to the oven for 10 more minutes. This sets everything together. The edges of the apples may caramelize slightly. That’s perfect.
Remove from oven and let cool to room temperature on a wire rack. Then refrigerate for at least 4 hours, preferably overnight. Proper chilling is crucial for clean slicing.
Adding the Caramel Drizzle
Once completely chilled, drizzle caramel sauce over the entire pan in a back-and-forth pattern. Use a spoon or squeeze bottle for control.
Sprinkle with sea salt if desired. The salt enhances the caramel flavor and adds sophisticated contrast. Just a light sprinkle is perfect.
Add chopped pecans now if using. They add crunch and elevate the presentation. Toast them first for deeper flavor.
Use the parchment overhang to lift the entire block out of the pan. Place on a cutting board. Cut into squares with a sharp knife, wiping the blade between cuts.
Delicious Variations to Try
Salted Caramel Pecan Bars
Use salted caramel sauce instead of regular. Add 1 cup of chopped, toasted pecans on top with the caramel drizzle. The nuts add buttery crunch that complements everything perfectly.
Mix some chopped pecans into the apple topping too. This distributes nutty flavor throughout. Press a whole pecan half into the center of each bar before serving for elegant presentation.
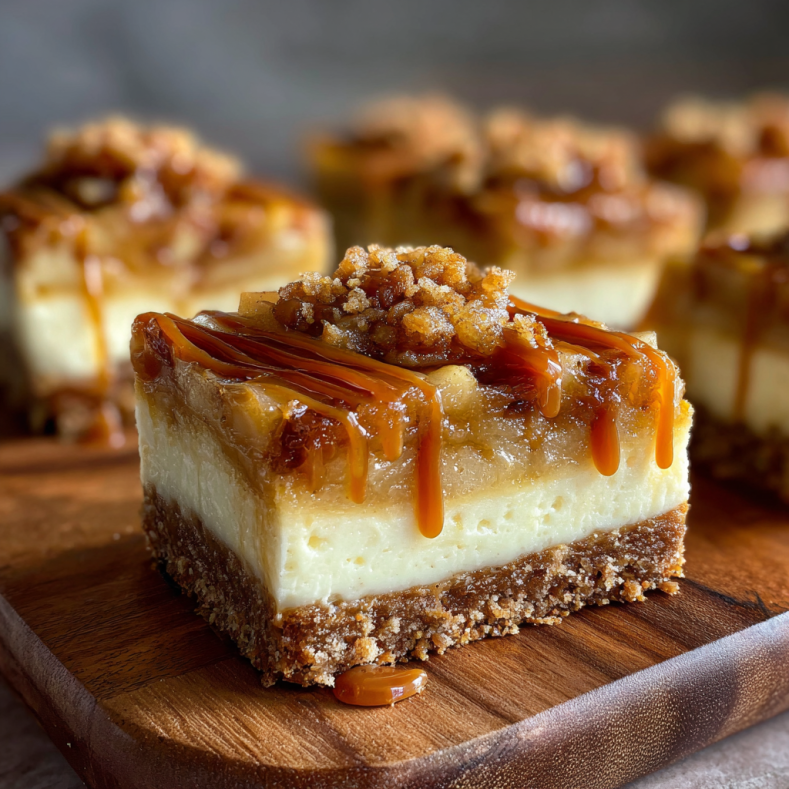
Cinnamon Sugar Crumble Topping
Make a simple crumble with 1/2 cup flour, 1/4 cup brown sugar, 1/4 cup cold butter, and 1 teaspoon cinnamon. Cut butter into dry ingredients until crumbly.
Sprinkle over the apple layer before the final 10 minutes of baking. It creates a crispy, sweet topping that adds textural contrast. This variation tastes like apple crisp meets cheesecake.
White Chocolate Drizzle Addition
Melt 1/2 cup white chocolate chips. Drizzle over the caramel in a contrasting pattern. The white chocolate adds creamy sweetness and makes the bars look bakery-professional.
You can also fold white chocolate chips into the cheesecake batter. They melt slightly during baking, creating pockets of sweetness throughout.
Maple Glazed Version
Replace half the caramel with pure maple syrup. Add 1/4 teaspoon maple extract to the cheesecake layer. Use maple sugar instead of brown sugar in the apple mixture.
This variation has deeper, more complex sweetness. It’s perfect for those who find regular caramel too one-note. The maple flavor pairs beautifully with apples and fall spices.
Serving Ideas for Maximum Enjoyment
Classic Presentation
Serve these caramel apple cheesecake bars chilled, straight from the refrigerator. The cold, creamy texture contrasts beautifully with the warm spices. Each bite is refreshing yet cozy.
Add a dollop of fresh whipped cream on top. The lightness balances the rich cheesecake. Sprinkle a tiny bit of cinnamon on the cream for extra flair.
Plate on white or cream-colored dishes. The golden caramel and warm brown apples look stunning against light backgrounds. Presentation matters, especially for special occasions.
À La Mode Style
Serve slightly warmed with vanilla ice cream. Microwave individual bars for just 15 to 20 seconds. The slight warmth makes the caramel gooey. The ice cream melts slightly on contact, creating a sauce.
This hot-and-cold combination is irresistible. The contrast in temperatures creates interesting textural play. It feels indulgent and special without extra effort.
Coffee Time Companion
Pair with strong coffee or hot apple cider. The beverages cut through the richness perfectly. The warmth of the drink complements the cool cheesecake beautifully.
Serve as dessert after a fall dinner. Or make them the star of an afternoon coffee gathering. Either way, they create moments worth savoring.
Storage and Make-Ahead Tips
Proper Storage
Store apple cheesecake bars in an airtight container in the refrigerator. They keep for 5 to 7 days when properly chilled. The cheesecake actually improves slightly over the first few days.
Layer parchment paper between stacked bars. This prevents them from sticking together. It also makes grabbing just one much easier.
Don’t leave them at room temperature for more than 2 hours. Cheesecake is dairy-based and needs refrigeration for food safety. Always return leftovers to the fridge promptly.
Make-Ahead Strategy
These bars are perfect for advance preparation. Bake them completely up to 3 days before your event. Keep refrigerated until serving time.
You can add the caramel drizzle right before serving if you prefer. This keeps it from being absorbed into the apples. Some people like it absorbed, others prefer it fresh and sticky.
For maximum make-ahead convenience, freeze the bars (see below). Bake weeks in advance. Thaw the day before serving. This frees up valuable kitchen time during busy seasons.
Freezing for Future Enjoyment
Freeze uncut bars for best results. Wrap the entire pan tightly in plastic wrap, then aluminum foil. Freeze for up to 2 months. The caramel can be added after thawing.
To thaw, move to the refrigerator 24 hours before serving. Slow thawing prevents condensation and texture issues. Once thawed, cut and serve normally.
You can also freeze individual bars. Wrap each one separately in plastic wrap. Store in a freezer bag. Thaw individual portions as needed for perfect portion control.
Pro Tips for Cheesecake Bar Success
Room temperature ingredients are crucial. Cold cream cheese creates lumps. Cold eggs don’t incorporate smoothly. Plan ahead and let dairy sit out for an hour.
Don’t overmix the batter. Once eggs are added, mix just until combined. Overmixing incorporates too much air, which causes cracks and uneven texture.
Use parchment paper. This single step makes removal effortless. Without it, you’ll struggle to get clean bars out. The overhang acts as handles.
Chill completely before cutting. Warm or room-temperature cheesecake is too soft. It smears when cut. Cold cheesecake slices cleanly with sharp edges.
Wipe your knife between cuts. Use a hot, wet knife for the cleanest slices. Dip in hot water, wipe clean, then cut. Repeat for each slice.
Conclusion: Your New Fall Baking Tradition
Caramel apple cheesecake bars deserve a place in your fall baking rotation. They combine everything we love about autumn into one incredible dessert. The flavors are perfectly balanced. The texture is luxurious. The presentation is stunning.
This fall dessert recipe works for every occasion. Thanksgiving dinner. Halloween parties. Weekend family gatherings. Tuesday afternoon because you deserve something special. The bars adapt to any situation beautifully.
The make-ahead nature removes stress from holiday baking. The crowd-pleasing flavor ensures empty plates. The relatively simple technique means you’ll actually want to make them again.
So grab some apples and cream cheese. Preheat that oven. Mix up something magical. In a few hours, you’ll be slicing into creamy, caramel-drizzled perfection that tastes exactly like fall should taste.
Your kitchen will smell incredible. Your family will be impressed. You’ll have created a new tradition.
Welcome to your new favorite fall dessert.
Frequently Asked Questions
Can I use canned apple pie filling instead of fresh apples?
You can, but fresh apples taste much better. Canned filling is often too sweet and has a different texture. It also lacks the warm spice notes from cooking fresh apples with cinnamon.
If using canned filling in a pinch, drain excess liquid first. Too much moisture makes the cheesecake layer soggy. Add extra cinnamon and a squeeze of lemon to brighten the flavor.
Fresh apples only take 10 minutes to prepare and cook. The superior flavor is worth the small extra effort. Your bars will taste homemade rather than pre-packaged.
Can I make caramel apple cheesecake bars ahead of time?
Absolutely! These easy cheesecake bars are perfect for advance preparation. Make them 2 to 3 days ahead. Store covered in the refrigerator until serving.
The flavors actually improve when made ahead. The cheesecake sets more firmly. The apple flavors infuse throughout. Many bakers prefer day-old bars for this reason.
Add the caramel drizzle just before serving if you want it fresh and sticky. Or add it when baking and let it soak in slightly. Both methods work well.
For maximum advance prep, freeze the bars up to 2 months ahead. Thaw in the refrigerator overnight before serving. This is perfect for holiday planning.
Do caramel apple cheesecake bars need to be refrigerated?
Yes! These bars contain cream cheese and eggs, both requiring refrigeration. Never leave them at room temperature for more than 2 hours. Food safety is important with dairy-based desserts.
The cold temperature also helps them hold their shape. Room temperature cheesecake is too soft. The bars won’t cut cleanly and may become messy.
Serve them chilled for best texture and flavor. The cool, creamy cheesecake contrasts beautifully with the spiced apples and caramel. That temperature combination is part of what makes them delicious.
Store leftovers in an airtight container in the refrigerator. They keep well for 5 to 7 days when properly chilled.
Can I use store-bought caramel sauce?
Definitely! Store-bought caramel saves time and works perfectly. Look for quality brands with good flavor and thick consistency. Thin caramel sauce runs off the bars too easily.
Ghirardelli, Torani, and Mrs. Richardson’s all make good caramel sauces. Check the baking aisle or ice cream toppings section. You can also use caramel ice cream topping.
For salted caramel version, look for salted caramel sauce. Or add your own flaky sea salt to regular caramel. Just a light sprinkle enhances the flavor beautifully.
Homemade caramel tastes amazing but requires extra time and skill. Start with store-bought. Once you’ve mastered the bars, try homemade caramel if you want.
Can I freeze apple cheesecake bars?
Yes! Freezing works beautifully for make-ahead convenience. Freeze the entire uncut pan wrapped tightly in plastic wrap, then foil. Or freeze individual bars wrapped separately.
Frozen bars keep for up to 2 months. Label with the date so you remember when you made them. Frozen desserts can look similar, so clear labeling helps.
Thaw in the refrigerator overnight. Never thaw at room temperature—this creates condensation that makes things soggy. Slow refrigerator thawing maintains texture.
Add caramel drizzle after thawing for best appearance. Frozen and thawed caramel can look slightly separated. Fresh drizzle looks more appealing and tastes better.