
Meta Description: Make the best chicken enchiladas at home! This easy recipe is cheesy, flavorful, and perfect for weeknight dinners. Ready in just 45 minutes!
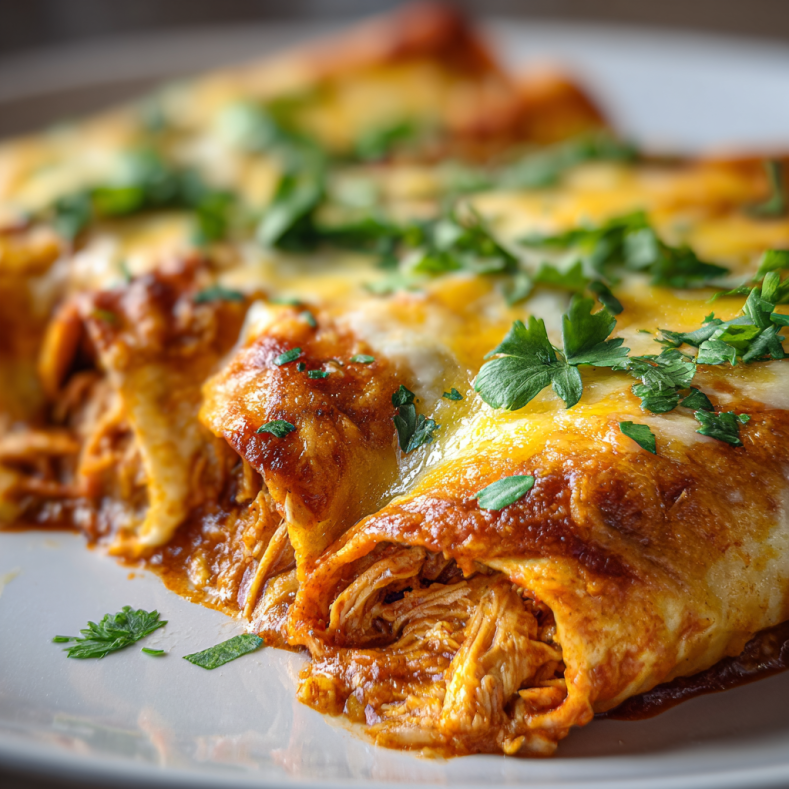
There are few things more satisfying than pulling a pan of bubbling chicken enchiladas from the oven. The cheese is golden and melted. The sauce is fragrant and rich. The tortillas are tender and perfectly rolled. Your family gathers around the table before you even finish setting it.
This is comfort food at its finest. Cheesy chicken enchiladas combine tender chicken, savory sauce, and gooey cheese wrapped in soft tortillas. Every bite delivers warmth, flavor, and satisfaction. It’s the kind of meal that makes everyone ask for seconds.
The best part? This easy chicken enchiladas recipe is surprisingly simple. You don’t need special skills or hard-to-find ingredients. Most items are probably in your kitchen right now. The assembly is straightforward. The results are spectacular.
Whether you’re feeding hungry kids, meal prepping for the week, or hosting Taco Tuesday, homemade enchiladas deliver every time. They’re customizable, make-ahead friendly, and always crowd-pleasing.
Ready to make your new favorite dinner? Let’s get started.
Why You’ll Love This Chicken Enchiladas Recipe ❤️
Flavor That Hits Every Note
These enchiladas balance all the flavors you crave. The sauce brings richness and depth. The chicken provides savory protein. The cheese adds creamy, melty goodness. Together, they create harmony in every bite.
The spices warm without overwhelming. The sauce coats everything perfectly. The cheese pulls into strings when you cut into them. It’s visually appealing and tastes even better than it looks.
Unlike some recipes that taste one-dimensional, this version has layers of flavor. Each component contributes something essential. Nothing feels like filler. Every ingredient earns its place.
Comfort Food Everyone Loves
Chicken enchiladas recipe brings people together. Kids love the cheesy, mild flavor. Adults appreciate the complexity. Even picky eaters usually approve. That universal appeal makes meal planning easier.
They’re also the kind of food that feels like a hug. Warm, satisfying, and familiar. Whether it’s a cold winter night or a regular Tuesday, enchiladas hit the spot.
The aroma alone creates anticipation. Your house smells amazing while they bake. That sensory experience is part of what makes this dish special.
Incredibly Versatile
Start with the basic recipe, then customize endlessly. Prefer green sauce? Swap it in. Want it spicier? Add jalapeños. Need it milder? Use mild enchilada sauce. The base adapts to your preferences.
You can also vary the filling. Add black beans for extra protein and fiber. Include corn for sweetness and texture. Throw in sautéed peppers and onions for more vegetables. The tortillas happily hold whatever you choose.
This flexibility means you’ll never get bored. One week it’s classic red sauce. The next week you try creamy white sauce. The week after that, you go for spicy verde. Same basic technique, different delicious results.
Perfect for Busy Weeknights
Despite tasting like you spent hours cooking, easy chicken enchiladas come together quickly. Using rotisserie chicken cuts prep time significantly. Store-bought sauce (or quick homemade) makes things even faster.
Most of the cooking is hands-off oven time. You assemble, pop it in, and walk away. No standing over the stove. No constant monitoring. Just check when the timer goes off.
They’re also excellent for meal prep. Make them on Sunday, eat all week. Double the batch and freeze half. Feed yourself or your family without daily cooking marathons.
Essential Ingredients for Perfect Enchiladas
The Sauce Foundation
For the Enchilada Sauce:
- 2 cups red enchilada sauce (store-bought or homemade)
- 1/2 cup sour cream (makes it creamy and rich)
- 1/2 cup chicken broth (thins the sauce slightly)
Store-bought enchilada sauce works perfectly. Look for quality brands with good reviews. Red sauce is classic, but green sauce (salsa verde) is equally delicious.
For homemade sauce, combine tomato sauce, chili powder, cumin, garlic powder, and a touch of flour to thicken. Simmer for 10 minutes. It tastes fresher but requires extra time.
The Chicken Filling
For the Star of the Show:
- 3 cups cooked chicken, shredded (rotisserie is perfect)
- 1 cup sour cream
- 1 can (4 oz) diced green chiles
- 1 teaspoon cumin
- 1 teaspoon garlic powder
- 1/2 teaspoon onion powder
- Salt and pepper to taste
- 1 cup shredded cheese (for the filling)
Rotisserie chicken is a game-changer. It’s already seasoned and tender. Just shred it and you’re ready to go. This shortcut saves at least 30 minutes.
Leftover cooked chicken works too. Thanksgiving turkey? Perfect. Meal prep grilled chicken? Excellent. Any cooked poultry adapts well to this recipe.
Tortillas and Cheese
For Assembly:
- 10-12 flour tortillas (8-inch size works best)
- 3 cups shredded Mexican blend cheese (or cheddar/Monterey Jack mix)
- Fresh cilantro for garnish (optional)
- Sliced jalapeños for topping (optional)
Cheese choice matters. Mexican blend provides good melting and flavor. Sharp cheddar adds more bite. Monterey Jack melts beautifully and tastes mild. Combine for best results.
Fresh cheese you shred yourself melts better than pre-shredded. Pre-shredded has anti-caking agents that affect texture. If time allows, shred your own.
Step-by-Step Assembly and Baking Guide
Preparing the Filling
Preheat your oven to 350°F. This moderate temperature cooks everything through without burning the top or drying out the filling.
In a large bowl, combine shredded chicken, sour cream, green chiles, and spices. Mix thoroughly until everything is evenly coated. Add 1 cup of shredded cheese and stir to combine.
Taste the filling. Adjust seasoning as needed. It should be flavorful on its own. Under-seasoned filling makes bland enchiladas no matter how good your sauce is.
Making the Sauce Mixture
In a separate bowl, mix enchilada sauce with sour cream and chicken broth. Whisk until smooth. This creates a creamier, richer sauce than straight enchilada sauce.
The sour cream adds tang and body. The chicken broth prevents it from being too thick. The balance creates sauce that coats tortillas perfectly without being gloppy.
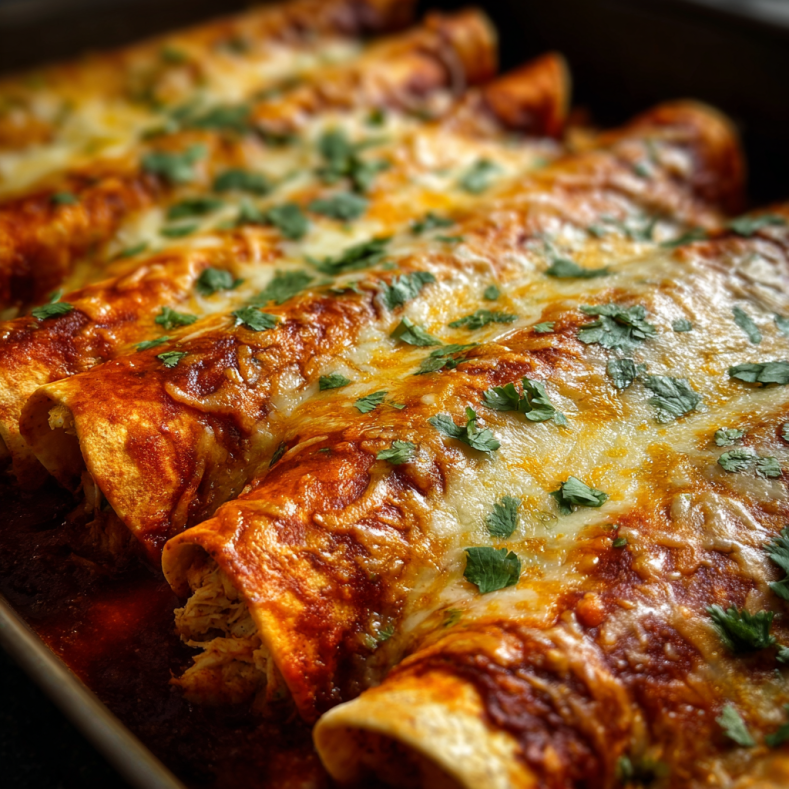
Pour about 1 cup of this mixture into the bottom of a 9×13-inch baking dish. Spread evenly. This prevents bottom tortillas from sticking and adds flavor.
Rolling the Enchiladas
Warm your tortillas slightly. Microwave them wrapped in a damp paper towel for 30 seconds. Or heat individually in a dry skillet for a few seconds per side.
Warm tortillas are pliable and less likely to crack. Cold tortillas often break when you try to roll them. This simple step prevents frustration.
Place a tortilla on your work surface. Spoon about 1/3 cup of filling down the center. Roll tightly and place seam-side down in your prepared baking dish.
Continue until all tortillas are filled and rolled. Arrange them snugly in the dish. They should fit comfortably without too much space between them.
Adding Sauce and Cheese
Pour the remaining sauce mixture over the rolled enchiladas. Use a spoon or spatula to spread it evenly. Make sure all the tortillas are covered. Exposed edges get dry and hard.
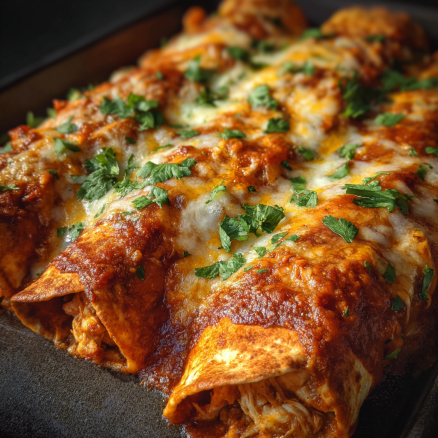
Sprinkle the remaining cheese generously over the top. Don’t be shy here. The cheese creates that irresistible golden, bubbly topping everyone loves.
You can add sliced jalapeños, black olives, or green onions on top at this point. These additions add flavor and visual interest.
Baking to Perfection
Cover the dish with aluminum foil. Bake for 20 minutes covered. This heats everything through while keeping moisture in.
Remove the foil. Bake for an additional 10 to 15 minutes uncovered. The cheese should be melted, bubbly, and starting to brown in spots.
Let the enchiladas rest for 5 minutes after removing from the oven. This allows the sauce to set slightly. Cutting immediately makes everything slide around on the plate.
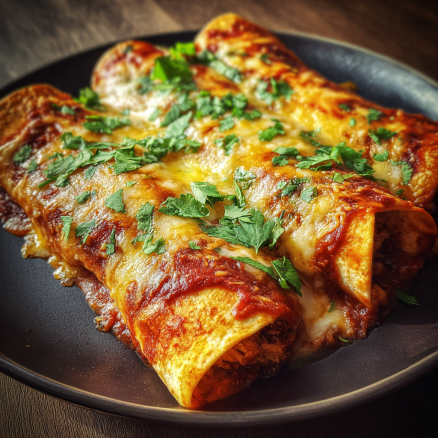
Garnish with fresh cilantro, extra sour cream, or sliced avocado. Serve hot and watch them disappear.
Delicious Flavor Variations
Green Chile Chicken Enchiladas
Swap red enchilada sauce for green enchilada sauce (salsa verde). Use Monterey Jack cheese instead of cheddar. Add extra green chiles to the filling.
This version is tangy and bright. The verde sauce has a different flavor profile—more citrusy and sharp. It’s delicious and refreshing.
Top with Mexican crema and fresh cilantro. The creamy elements balance the tangy sauce perfectly.
Creamy White Sauce Enchiladas
Make a white sauce with butter, flour, chicken broth, and sour cream. This creates a rich, creamy base instead of tomato-based sauce.
Add cooked spinach to the filling for extra nutrition and color. Use white cheese like Monterey Jack or white cheddar.
This variation is milder and richer. It’s perfect for people who prefer less spicy food. Kids often love this version.
Spicy Red Enchiladas
Use hot enchilada sauce or add chipotle peppers in adobo to your sauce. Include diced jalapeños in the filling. Top with pepper jack cheese.
This version brings the heat. It’s for spice lovers who want their food to have a kick. The heat builds with each bite but never overwhelms.
Serve with cooling elements like sour cream, guacamole, or Mexican crema. The contrast between hot and cool makes each bite interesting.
Loaded Chicken Enchiladas
Add black beans, corn, and sautéed bell peppers to your filling. This creates a more substantial, vegetable-forward version.
Use a combination of cheeses—cheddar, Monterey Jack, and a bit of cotija. The multiple cheeses create complex flavor.
Top with everything: olives, green onions, tomatoes, and avocado. These enchiladas become a complete meal in themselves.
Serving Ideas for Complete Meals
Classic Mexican Sides
Serve cheesy chicken enchiladas with Mexican rice and refried beans. This traditional combination creates a complete, satisfying plate.
The rice soaks up extra sauce. The beans provide additional protein and fiber. Together, they create that authentic Mexican restaurant experience at home.
Add a simple side salad with lime vinaigrette. The fresh greens and tangy dressing balance the rich enchiladas nicely.
Fresh and Light Accompaniments
Pair with a crisp romaine salad topped with pico de gallo and avocado. The fresh vegetables provide textural contrast to the soft enchiladas.
Make quick pickled red onions for topping. The bright, tangy flavor cuts through the richness beautifully. They’re easy to make and add professional flair.
Serve with fresh lime wedges for squeezing. The citrus brightens all the flavors and adds freshness to each bite.
Party-Style Spread
Create an enchilada bar for gatherings. Serve the enchiladas alongside bowls of toppings. Let guests customize their plates.
Offer sour cream, guacamole, salsa, jalapeños, cilantro, cheese, and lime wedges. This interactive approach makes dinners fun and accommodating.
Add chips and queso or fresh guacamole as starters. Finish with churros or sopapillas for dessert. Your Mexican feast is complete.
Storage and Reheating Tips
Storing Leftovers
Let enchiladas cool completely before storing. Cover the dish tightly with aluminum foil or transfer to airtight containers. They keep for 3 to 4 days in the refrigerator.
The sauce soaks into the tortillas as they sit. Some people actually prefer day-old enchiladas for this reason. The flavors meld and deepen overnight.
Store any toppings separately. Sour cream, avocado, and fresh cilantro should be added fresh when serving leftovers.
Reheating for Best Results
Reheat covered in a 350°F oven for 20 to 25 minutes. The foil keeps moisture in. Remove it for the last 5 minutes to crisp the cheese slightly.
Individual portions reheat well in the microwave. Cover with a damp paper towel. Heat on 50% power in 1-minute intervals. This prevents drying out.
Add fresh toppings after reheating. Fresh sour cream, cilantro, and avocado make leftovers taste restaurant-fresh.
Freezing for Make-Ahead Meals
Homemade enchiladas freeze beautifully. Assemble completely but don’t bake. Cover tightly with plastic wrap, then aluminum foil. Freeze for up to 3 months.
Bake from frozen by adding 20 to 30 minutes to the cooking time. Keep covered for the first 30 minutes. This prevents burning while the center thaws and heats.
You can also freeze baked enchiladas. Cool completely first. Wrap tightly and freeze for up to 2 months. Thaw overnight in the refrigerator before reheating.
Portion into individual servings before freezing. This allows you to defrost exactly what you need without committing to the whole pan.
Pro Tips for Enchilada Success
Use rotisserie chicken. This single shortcut cuts prep time in half. The chicken is already seasoned and tender. Just shred and use.
Don’t overfill tortillas. Too much filling makes rolling difficult and causes bursting. Use about 1/3 cup per tortilla. It’s enough without being excessive.
Warm tortillas before rolling. Cold tortillas crack. Warm tortillas bend. This simple step prevents frustration and torn enchiladas.
Cover the edges with sauce. Exposed tortilla edges get hard and dry. Make sure sauce covers everything for even texture.
Let them rest before serving. Five minutes of patience allows everything to set. Your enchiladas will slice and plate beautifully instead of sliding around.
Conclusion: Your New Weeknight Favorite
Chicken enchiladas recipe deserves a permanent spot in your dinner rotation. They’re comforting, flavorful, and endlessly customizable. They please everyone at the table. They make great leftovers. They freeze beautifully for future meals.
The combination of tender chicken, rich sauce, and melted cheese wrapped in soft tortillas creates magic. It’s the kind of meal that makes ordinary evenings feel special. It’s the dinner everyone requests and nobody complains about.
Whether you make the classic version or experiment with variations, easy chicken enchiladas deliver every time. They’re approachable enough for beginners but impressive enough for entertaining.
So grab some tortillas and chicken. Mix up that flavorful filling. Roll those enchiladas with love. In less than an hour, you’ll be serving a meal that looks impressive and tastes incredible.
Welcome to your new favorite dinner. You’re going to make these again and again.
Frequently Asked Questions
Can I use rotisserie chicken for enchiladas?
Absolutely! Rotisserie chicken is perfect for chicken enchiladas recipe. It’s already cooked and seasoned. Just shred it and you’re ready to go.
One standard rotisserie chicken provides about 3 to 4 cups of shredded meat. That’s exactly what you need for a full pan of enchiladas.
Remove the skin before shredding. The meat underneath is tender and flavorful. Dark meat works just as well as white meat. Use whatever you prefer or mix both.
This shortcut saves at least 30 minutes of cooking time. It’s one of the best time-saving tricks for busy weeknight dinners.
What’s the best cheese for chicken enchiladas?
Mexican blend cheese is ideal. It combines cheddar, Monterey Jack, and sometimes others. The mix provides good melting and balanced flavor.
Sharp cheddar adds more pronounced flavor. Monterey Jack melts smoothly and tastes mild. Combining them gives you best of both worlds.
For authentic flavor, add some crumbled queso fresco or cotija on top. These Mexican cheeses add salty, tangy notes that taste traditional.
Avoid mozzarella—it doesn’t have enough flavor for enchiladas. Pre-shredded cheese works but fresh-shredded melts better. If you have time, shred your own.
Can I freeze chicken enchiladas?
Yes! Homemade enchiladas freeze beautifully. You can freeze them before or after baking. Both methods work well.
To freeze unbaked, assemble completely in a disposable aluminum pan. Cover tightly with plastic wrap, then foil. Freeze for up to 3 months.
Bake from frozen without thawing. Add 20 to 30 minutes to the baking time. Keep covered for most of the cooking to prevent burning.
To freeze baked enchiladas, cool completely first. Wrap tightly and freeze for up to 2 months. Thaw overnight in the refrigerator. Reheat covered at 350°F.
How do I prevent soggy tortillas in enchiladas?
Lightly toast tortillas in a dry skillet before filling. Just 10 seconds per side. This creates a slight barrier that resists sogginess.
Don’t over-sauce. Use enough to coat and flavor but not so much that tortillas swim in liquid. About 1/4 cup sauce per enchilada is right.
Bake uncovered for the last 10 to 15 minutes. This allows excess moisture to evaporate. The tops should look set, not soupy.
Let them rest 5 minutes before serving. This allows sauce to be absorbed evenly. Cutting immediately releases all the liquid at once.
Can I make enchiladas with corn or flour tortillas?
Both work! Flour tortillas are traditional for chicken enchiladas. They’re soft, pliable, and less likely to crack when rolling.
Corn tortillas are more authentic and gluten-free. They have more corn flavor and slightly firmer texture. Warm them well before using to prevent cracking.
For corn tortillas, quickly fry them in oil for 5 seconds per side. This makes them more pliable and adds flavor. Pat excess oil before filling.
Size matters too. 8-inch tortillas are ideal. Smaller ones don’t hold enough filling. Larger ones are harder to roll and fit in the pan. Choose based on availability and preference.