

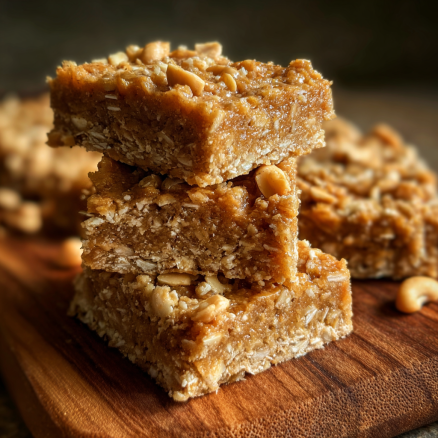
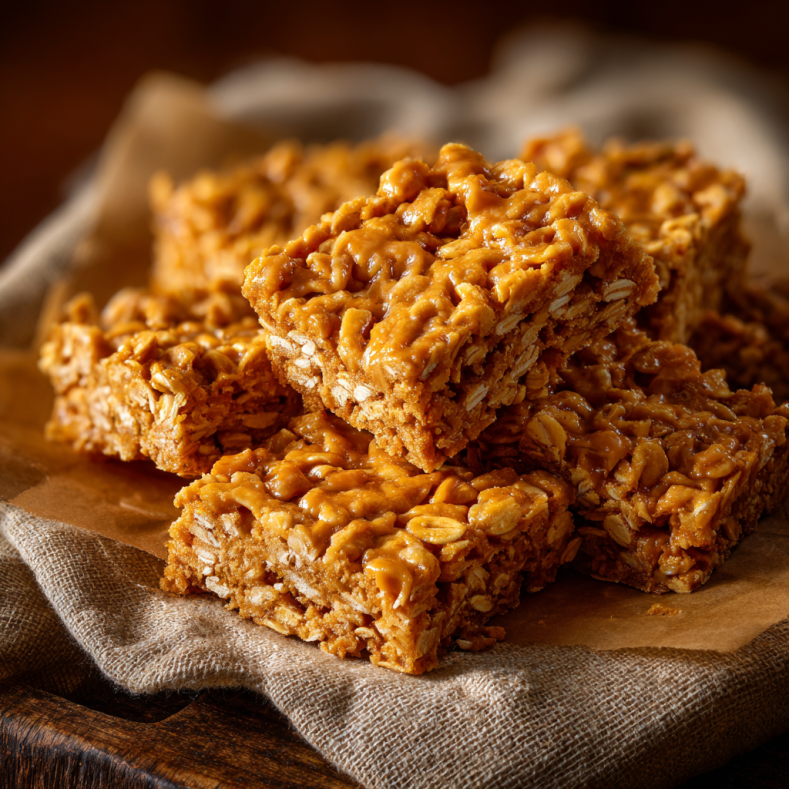
Stop buying expensive energy bars at the gym. These peanut butter oat energy bars are the answer to convenient, delicious, nutritious snacking. With just a handful of simple ingredients and zero baking required, you can create no bake energy bars that taste better than anything store-bought and cost a fraction of the price. This is healthy snack recipes at its finest—wholesome ingredients transformed into something irresistibly crave-worthy.
What makes these homemade protein bars so special is their perfect combination of nutrition and taste. They’re packed with protein and fiber from peanut butter and oats, naturally sweetened with honey, and studded with chocolate chips and nuts. The result? A chewy, satisfying bar that keeps you full for hours while tasting like pure indulgence. Moreover, they’re no-bake, which means no oven required—just mix, press, chill, and cut. This makes them perfect for busy schedules, meal prep, or anyone who wants healthy snacks without the hassle.
Whether you’re looking for pre-workout fuel, post-workout recovery, or simply a healthier alternative to store-bought candy bars, these energy bars deliver. Let’s explore what makes them so wonderful and how to create your own batch.
Why You’ll Love This Recipe
This recipe checks every box for the perfect healthy snack.
Nutritious and Satisfying
First, these bars are packed with real nutrition. Peanut butter provides protein and healthy fats that keep you satisfied for hours. Oats deliver fiber and complex carbohydrates for sustained energy. Additionally, nuts and seeds add minerals, healthy fats, and crunch. Meanwhile, honey provides natural sweetness plus B vitamins and antioxidants. This isn’t empty-calorie snacking—this is food that nourishes your body.
Naturally Sweet Without Refined Sugar
These bars taste indulgent and sweet because of quality ingredients, not processed sugar. The honey provides natural sweetness while adding nutritional value. Furthermore, chocolate chips add richness without requiring additional sweeteners. This means you satisfy cravings while making a genuinely healthy choice.
Easy to Make Ahead
Perhaps the best feature is the make-ahead capability. Prepare a batch on Sunday and enjoy energizing snacks all week. No baking means no heating up your kitchen. Furthermore, the no-fuss process means even busy people can create healthy snacks. Cut into bars and portion into grab-and-go containers for ultimate convenience.
Perfect for Any Occasion
These bars work as pre-workout fuel, post-workout recovery, breakfast-on-the-go, mid-afternoon snack, or even a healthier dessert. Their versatility makes them perfect for virtually any situation.
Ingredient Breakdown: Simple Components, Powerful Nutrition
This recipe succeeds because it uses quality, recognizable ingredients.
The Base: Peanut Butter
You’ll need 1 cup natural peanut butter (or almond butter, sunflower seed butter, or cashew butter). Choose creamy or chunky based on preference. Natural peanut butter—with just peanuts and salt—creates superior texture and taste. Additionally, it provides protein (about 4g per tablespoon) that keeps you satisfied.
The Texture: Rolled Oats
Include 2 cups rolled oats (old-fashioned oats, not instant). Rolled oats provide fiber, complex carbohydrates, and chewy texture. Furthermore, they’re one of the most nutritious, affordable base ingredients available.
The Sweetener: Pure Honey
Use ½ cup honey (or maple syrup if preferred). Honey binds everything together while adding natural sweetness, depth, and nutrition. Raw honey provides additional enzymes and antioxidants if you prefer that option.
The Add-Ins: Nuts, Seeds, and Chocolate
Include ½ cup chopped almonds or walnuts, ¼ cup ground flaxseed or chia seeds, and ½ cup chocolate chips (dark chocolate preferred for extra antioxidants). Additionally, add 1 teaspoon vanilla extract and ¼ teaspoon sea salt for flavor enhancement.
Step-by-Step Process: Simple and Satisfying
Prep Time: 15 minutes | Chill Time: 1-2 hours | Makes: 12-16 bars
Follow these simple steps for perfect results.
Step 1: Gather and Measure
Assemble all ingredients before beginning. This ensures you have everything on hand and makes the process smooth and efficient. Additionally, pre-measuring prevents mistakes and speeds up assembly.
Step 2: Mix the Base
In a large bowl, combine 1 cup peanut butter and ½ cup honey. Stir thoroughly until completely combined. The mixture should be thick and well blended. Use a sturdy spoon or your hands—this mixture is thick and resistant to regular utensils.
Step 3: Add Dry Ingredients
Add 2 cups rolled oats, ½ cup chopped nuts, ¼ cup ground flaxseed or chia seeds, and 1 teaspoon vanilla extract. Stir until everything is evenly distributed. Continue stirring until the mixture holds together when pressed. The oats will gradually soften and bind as you stir.
Step 4: Fold in Chocolate
Gently fold in ½ cup chocolate chips with a spatula or wooden spoon. Don’t overmix or you’ll break the chips. A few broken chips are fine—they add extra chocolate throughout.
Step 5: Press into Pan
Line an 8×8-inch baking pan (or 9×9-inch for thinner bars) with parchment paper, leaving overhang on the sides. Transfer the mixture to the prepared pan. Using wet hands or an offset spatula, press the mixture firmly and evenly into the pan. The wetter your hands, the easier pressing becomes. Additionally, wet hands prevent sticking.
Step 6: Refrigerate Until Firm
Refrigerate the pan for at least 1-2 hours until the mixture is completely firm and set. For faster results, place in the freezer for 30-45 minutes. The bars must be firm before cutting or they’ll crumble. Meanwhile, this chilling time also allows flavors to meld beautifully.
Step 7: Cut Into Bars
Remove from the refrigerator and use the parchment paper overhang to lift the entire slab from the pan. Place on a cutting board. Using a sharp knife (dip in warm water between cuts for clean slices), cut into 12-16 bars depending on desired size. The bars should be firm and slice cleanly.
Flavor Variations to Explore
The basic recipe is fantastic, but simple additions create exciting new versions.
Almond Butter and Blueberry Version
Substitute 1 cup almond butter for peanut butter. Add ½ cup dried blueberries instead of (or alongside) chocolate chips. This creates a more refined flavor profile with antioxidant benefits from blueberries.
Cranberry Walnut Twist
Include ½ cup chopped walnuts and ½ cup dried cranberries. Additionally, add ¼ teaspoon orange zest for brightness. This variation feels sophisticated and autumnal.
Chocolate Drizzle Upgrade
After pressing into the pan, melt ½ cup dark chocolate and drizzle over the surface in decorative lines. Refrigerate until the chocolate sets completely. This creates a bakery-like appearance and extra chocolate richness.
Coconut Tropical Version
Add ½ cup shredded coconut (unsweetened or lightly sweetened), ¼ cup chopped macadamia nuts, and ½ cup white chocolate chips. This creates a tropical, resort-like treat.
How to Store and Pack for Meal Prep
Strategic storage keeps these bars fresh and convenient for weeks.
Refrigerator Storage
Store in an airtight container in the refrigerator for up to 2 weeks. Layer bars between parchment paper to prevent sticking. The bars maintain perfect texture when refrigerated.
Freezer Storage for Long-Term
Wrap individual bars in plastic wrap or parchment paper, then place in a freezer-safe bag. They freeze beautifully for up to 3 months. Thaw at room temperature for 15-20 minutes before eating, or enjoy frozen for a firmer texture.
Meal Prep Packing
Portion bars into individual portions in containers or zip-lock bags. Label with the date. These grab-and-go portions are perfect for lunch boxes, gym bags, or desk drawers. Additionally, individual portions prevent temptation to overeat.
Travel-Friendly
These bars travel beautifully. Wrap individually and pack in coolers or bags. They stay fresh without refrigeration for 2-3 hours, making them perfect for hiking, road trips, or outdoor adventures.
Serving Ideas: Energize Your Day
These peanut butter oat energy bars work beautifully in many situations.
- Pre-Workout Fuel: Eat one 30 minutes before exercise for sustained energy and protein.
- Post-Workout Recovery: The carbohydrates and protein make them perfect post-exercise for muscle recovery.
- Breakfast On-the-Go: Grab a bar with coffee for a quick, satisfying breakfast before busy mornings.
- Afternoon Snack: Combat the 3pm energy slump with these filling, nutritious bars.
- Lunch Box Addition: Pack alongside sandwiches and fruit for balanced, complete lunches.
- Healthier Dessert: Satisfy sweet cravings with these nutrient-dense treats instead of processed candy.
Frequently Asked Questions
Can I make these energy bars vegan?
Absolutely! Use maple syrup or agave nectar instead of honey. Additionally, use dairy-free chocolate chips instead of regular chocolate. Everything else is naturally vegan, making this easy to adapt.
Do I have to bake them?
No baking required—that’s the beauty! These are completely no-bake, which means no oven heating and no baking expertise needed. Simply mix, press, chill, and cut.
Can I use rolled or quick oats?
Rolled oats (old-fashioned) work best because they provide texture. Quick oats work but create a denser bar. Avoid instant oats, which create a mushy texture. Rolled oats are ideal.
How long do they last in the fridge?
These bars keep beautifully in the refrigerator for up to 2 weeks in an airtight container. The texture remains excellent throughout the storage period. Additionally, they actually taste better after a day or two when flavors have melded.
Can I freeze them for later?
Definitely! Wrap individual bars and freeze for up to 3 months. Thaw at room temperature before eating, or enjoy frozen for a firmer texture. They maintain excellent quality when properly frozen.
Final Thoughts: Healthy Eating Made Delicious
These peanut butter and oat energy bars prove that healthy snacking doesn’t require sacrifice. With just simple, recognizable ingredients and a no-bake process, you create something that tastes indulgent while actually nourishing your body. Moreover, the make-ahead convenience means you always have nutritious snacks available.
Start making a batch this week. Prepare them on Sunday for grab-and-go snacking throughout the week. Share them with friends and watch their reactions when you tell them they’re homemade. Furthermore, you’ll find these become your go-to snack for any occasion.
Chewy, satisfying, and absolutely delicious—that’s what these homemade protein bars bring to your snacking routine. Make them today.
Ready to ditch store-bought energy bars forever? Make these peanut butter and oat energy bars this week and discover how easy it is to create healthy snacks that actually taste incredible!